
Clouds
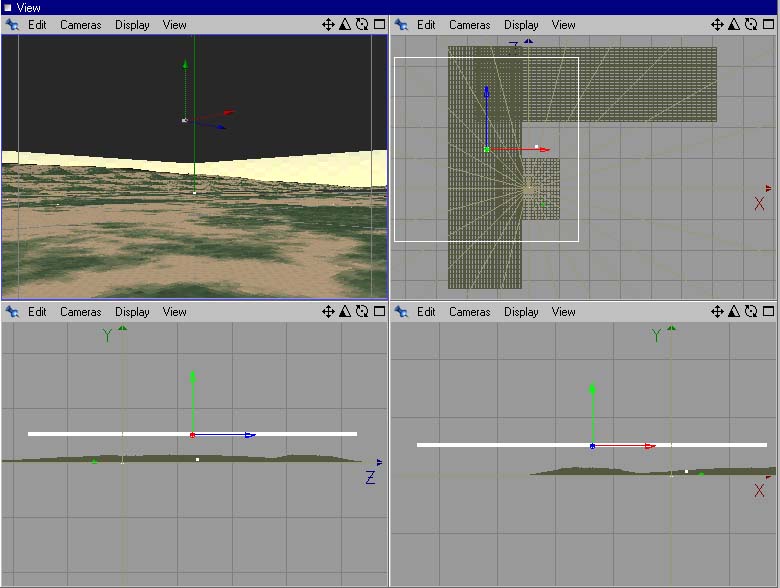
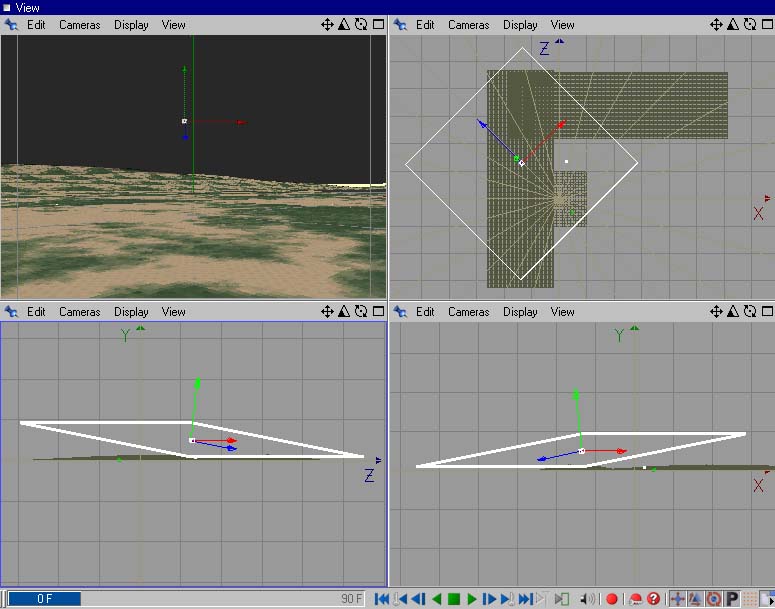
Now we prepare the scene to get ready for clouds. There are several methods to use an enviroment for clouds. We will use a polygon. Now create one 'Objects->Primitive->Polygon'. Make it 6000 times 6000 as seen in the picture below. Also change position as seen below.
Now you have the first plane, but you need more. Use the duplicate command for that. Choose 'Functions->duplicate'. Use the values seen below. Don't forget to use instances!

Now you scene look exactly like the one below, or at least similar. Nothing worth to die for, eh?
Anyway we are gonig on. At least two things need to be changed to prevent us from seeing nothing later on. First of all change the render settings. This is Ray Depth and Shadow Depth.
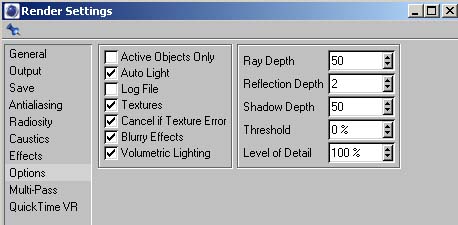
If you don't change
the render setting you will see nothing but a black sky later on
!!!!!!!
Second thing is, if the polygons stay as they are right now the
upcomming results will be funny but not what we want, because you
are able to see through the planes and the clouds look like
pieces of cutted clouds. If you haven't done it already, throw
your polygon object into the Null object that was created during
the duplication process. Rename your Null Object into Clouds. The
only thing that needs to be corrected is the axis of the now
named Clouds object. The axis is rigth now on X,Y,Z - 0,0,0. It's
better for handling if it would have the coordinates of the
original polygone object.
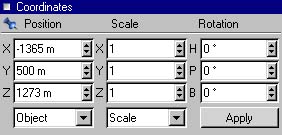
So click on the axis tool and then change the the coordinates to the above - these coordinates should have the same values as the polygon object. When done with this go back to the object tool. We are now going to rotate the whole Clouds object.
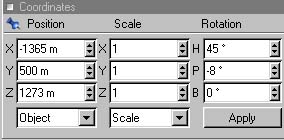
The H angle isn't
that mighty (only for this scene) BUT the -8 degree is esentially.
So don't forget that one.
Now your clouds object should be rotated and look like the one
below
If it looks like the above we can go ahead. If it doesn't look like the above there was a fault somewhere somehow and you should search for it. If you haven't understand something till this point, or if there is a mistake you found, please drop me a note. If you are alright, we can start to make the material for the clouds.
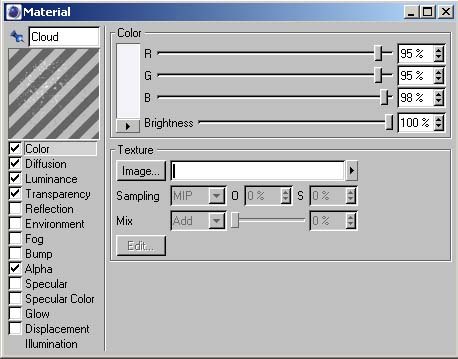
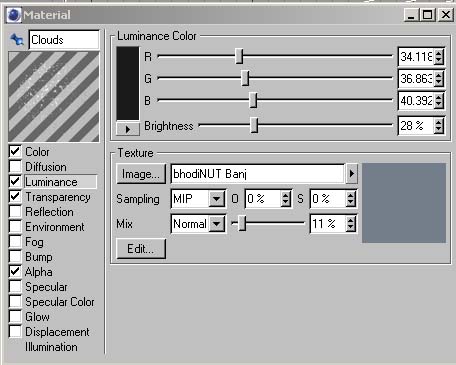
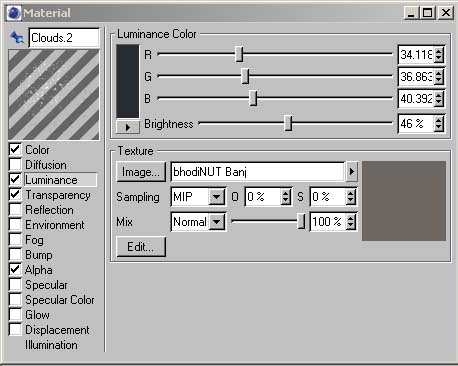
Create a new material and name it cloud. For the color use the parameters below.
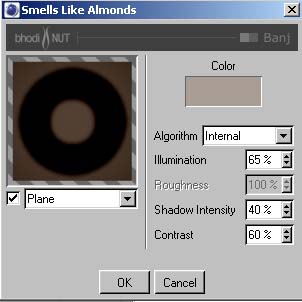
Now we need Luminance because this is the one that is very mighty for our clouds. We will use bhodiNUT Banj for that reason because we have control over the background lightning of the material. You may play with the parameter for this shader. If you are curious and want to play with the parameters you may use http://clouds.liquid-light.org/clouds2/tut5.html as a reference..
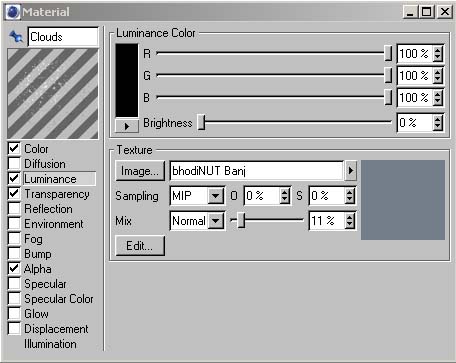
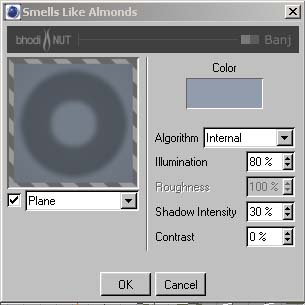
Use the parameters
on the right side to ajust Banji. Note that in this case Banji is
used ony with 11% in the luminance channel. To adjust the color
click into the colored box right above and change the color to
145-157-172 RGB.
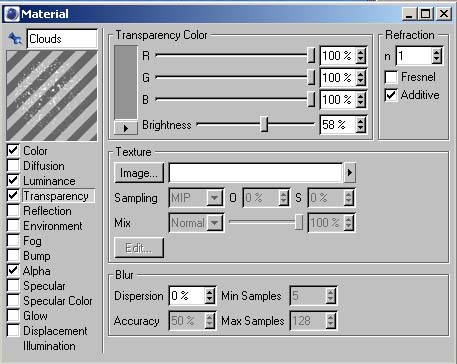
Next we will use Transparency in addition to the alpha channel.
Set transparency to 58% as see below.
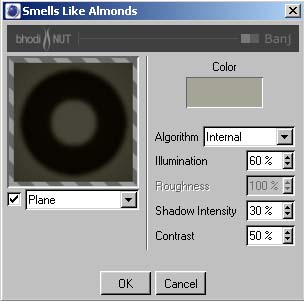
Next important channel is the Alpha. This one gives us the control over the overall look of the cloud, it's shape, look and density. We will use one that gives us pretty smooth clouds so. Because of the polygons we used we need of course a 3D noise to get the desired effect. Watch the settings below.
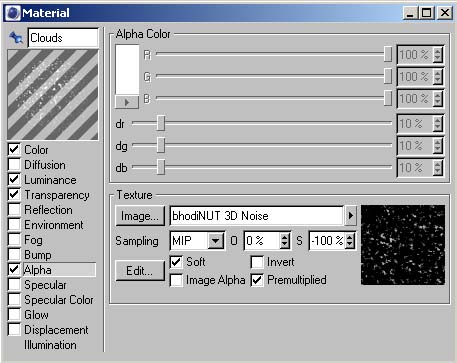

There are generally two factors that can completly change your cloud. First of all the Global Size and second the Octaves setting (below the 3d noise). Depending on the 3D noise you use the cloud changes a lot. Also of interest are the clipping in the right below corner. I often use to Low Clipping to get more dark areas and therefore less clouds. Also increasing the contrast helps in this case. Also notice that the color on the left side was changed to flatten things (it's usually black and white). DId I forget something? Hopefully not. Oh, one thing. Notice the small value of 0.07 at Animation Speed. This setting changes the form of your cloud over the time. The clouds do not move here. To realize that I usually use the material parameters at OM. If you are finished you should attach the material to the clouds object. You may use flat projection. And now.
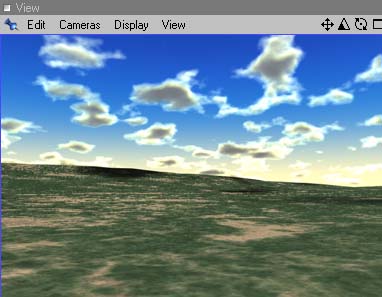
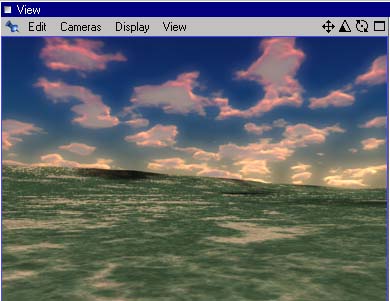
RENDER IT
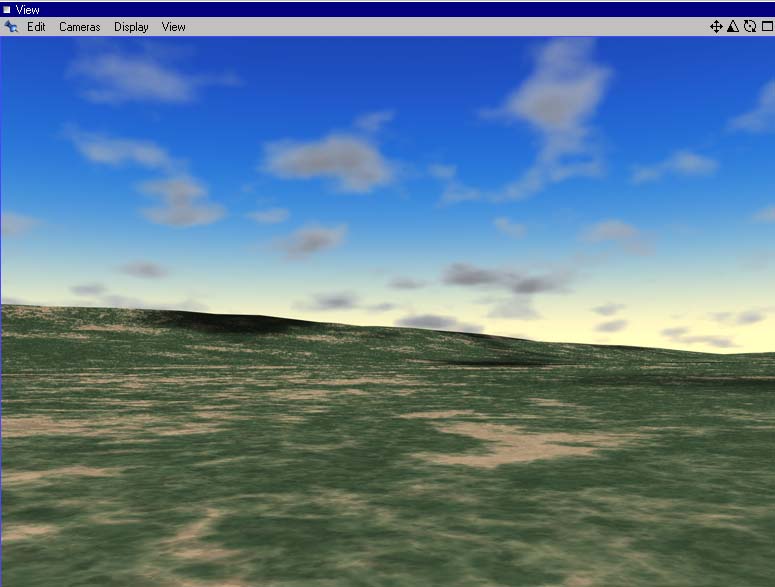
Now your picture should look like this or at least very similar to it. In the next chapter we will add an additional light to the scene and see what happens. But for now, to give you an idea what changes can do we change some parameters.
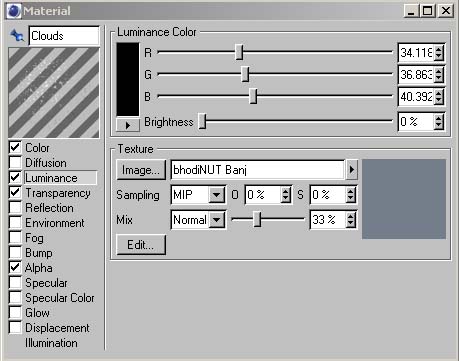

Only the luminance was changed from 11% to 33% with the above example.

In this example luniance brightness was change to 25% wereas the texture (Banji) stays at 11%. Next one:
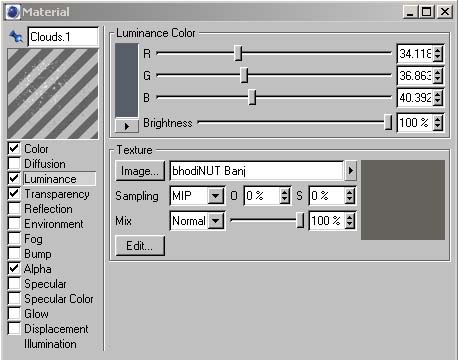
This one uses luminance at 100% for texture and brightness. In addition Banji was changed
 color was
changed to 165-165-152.
color was
changed to 165-165-152.
And another one. This uses slighty changed Banji values and in addition the new glow effect. Most parameters can be seen below. The Banji color was changed a little bit to red and the color of the background sphere was changed to 50% instead of 100%. That should give you the result below.
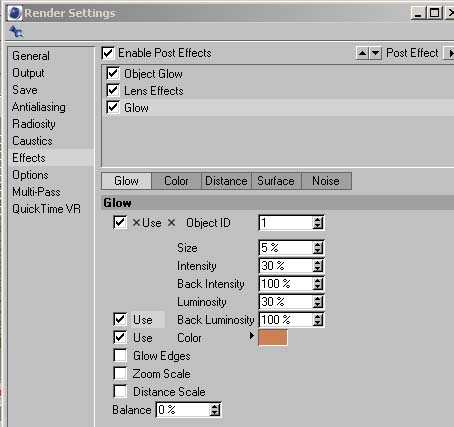
BTW: It depends on
your Banji parameters but sometimes only the change of Luminance
brightness and Texture changes your clouds dramatically. Banji
usually makes the edge of a cloudbrighter. To make the bottom of
the cloud brighter you can set brightness to a higher value and
reduce texture and so on...
Ok. when you finished playing aroud just......